
I was well-informed about door magnets before the cruise because I am a retired "DISigner" on the DISboards "Creative DISigns" Community and used to fill many requests for door magnets. Not to mention, I have decorated my door on past Christmas cruises.
I designed all of the magnets myself, though not without inspiration from other Disney cruisers and DISigners. If you need ideas or want designs personalized, I'd recommend that you visit the "Creative DISign" board - there are several active DISigners who would love to help you. Also, there are a few design groups on Facebook - "Graphics for All Lovers of Disney" and "Magical Mickey Graphics and More" that I know of. I'm going to give my old DISigner spiel... I do not recommend that you purchase graphics from sites like Ebay or Etsy. Not only are these sellers distributing copyrighted Disney graphics illegally, but many have actually stolen designs from DISigners on the DISboards, profiting from something that is not their own work.
Now if you're curious as to how I made my magnets...
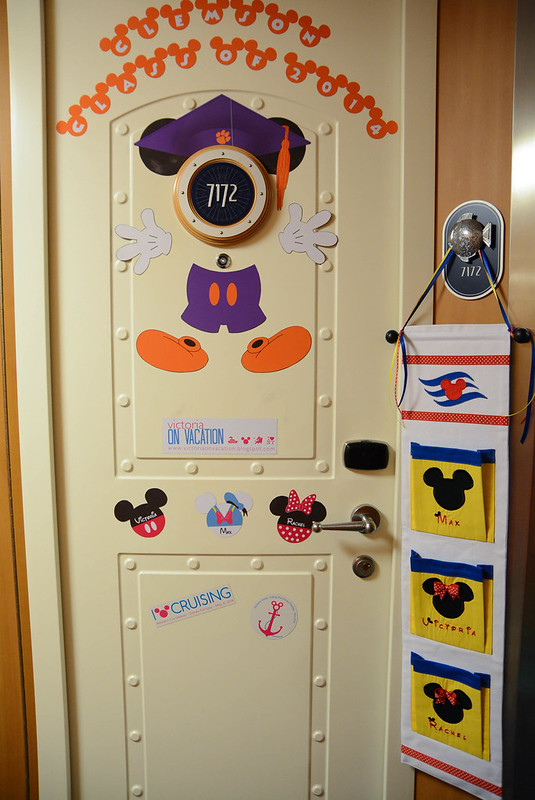
For my door, I wanted to commemorate my graduation, and I love how other cruisers have been putting ears on the stateroom porthole number. The portholes on the doors are 7.5" in diameter.
To make my Mickey ears, I used AutoCAD (you can download the student version - what I use - for free from Autodesk). I simply imported and traced over an image of a graduation hat and added Mickey ears, fitting around a 7.5" circle.
I then saved as a 2007 DXF and opened in Adobe Illustrator (do not scale). There, I colored the cap "Regalia" (Clemson Purple), the tassel Clemson Orange, and added the tiger paw.
I then saved as a PDF and opened in Adobe Photoshop where I added shadows to the hat (by selecting the areas I wanted to shade using the polygonal lasso tool, shading with black paint set at a light opacity and no hardness) and texture to the tassel (by selecting the tassel with the polygonal lasso tool and adding a tassel texture I found on the internet, changing the layer to "overlay" and masking with my tassel selection).
I then saved as a PNG and opened again in Adobe Illustrator where I had to cut the hat in two pieces so that it could fit on an 8.5x11" sheet of paper.
All other body parts were much easier because they didn't have to fit around the porthole, and I did not add shading. I simply Google-searched "Mickey's Gloves," "Mickey's Pants," and found silhouettes that I liked which I imported into AutoCAD and traced, then saved as a 2007 DXF and opened in Illustrator to scale and paint. The reason that I work with AutoCAD and Adobe Illustrator, rather than just using images from the internet, is not only so that I can make adjustments, but also so that I have vector drawings. Vector drawings (PDFs, DXFs, DWGs) can be blown up in size without pixelizing, unlike raster images (JPEGs, PNGs) which decrease in quality when they are enlarged.
All of the magnets were printed on magnetic sheets that I had ordered a long time ago from a website called "Print on It". And by a long time ago, I mean four years ago. I know now that I should have sprayed a fixative on the magnetic sheets before cutting because the ink (most noticeably black) was easy to rub off. However, to be honest, I didn't have time for that because I was scrambling to make magnets the night before my graduation!
As an alternative to magnetic sheets, you could print the magnets on cardstock (and even laminate) and attach magnets to the back. I was glad that I used the magnetic sheets, though, because all of the magnets stayed securely on the door.
Also, Disney sells door magnets in their gift shop onboard. So if you go on the cruise without magnets and begin to feel left out, it's not too late to join in!
My mom sewed my Fish Extender
I looked into buying them off Etsy (I said don't buy Disney graphics from Etsy... personally, I think other crafts are okay), but they were all $40+, and to be honest, I wasn't impressed by the craft of many of them. The ones which I found to be well-crafted were simple, and the more elaborate ones were just too many prints for my liking. Bottom line was that I knew I would not be happy with shipping my request off to someone across the states who makes hundreds of Fish Extenders a year. I knew exactly who I wanted to make my Fish Extender.... someone with a high standard of excellence who would do it for absolutely free..... my mother!
Luckily, she agreed! I asked her if she wanted me to purchase a pattern from Etsy, and she said no need - the dimensions were simple. We did download the Mickey Ear Hat font which had to be converted to 16 floppy disks for her Husqvarna Viking! We worked together to design the FE. I wanted something simple, traditional, and clean. Because our stateroom isn't actually a family, but rather an odd combination of myself and my two favorite people, I opted for the DCL logo, rather than "The Shingleton Family (+Max)".
I didn't see it until she gave it to me on the ship, and I am so happy with how it turned out! Thanks, Mom!!!
Do you decorate your door? Post a photo of your door decorations in the comments below!
No comments:
Post a Comment